Hiking the John Muir Trail – The John Muir Trail is a 211 mile stretch between Happy Isles in Yosemite Valley and Mt. Whitney in the California desert.
While hardcore backpackers will hike the entire length in as little as 15 days, the Yosemite National Park portion of the John Muir Trail makes for a beautiful escape for backpackers with less time (or a lack of desire to go the distance).
Here’s what you should know before hiking the John Muir Trail.
Where to Start and End a Yosemite National Park John Muir Trail Backpacking Trip
Yosemite National Park is certainly not one of the least crowded national parks to visit, but the masses can be avoided by hiking the back country.
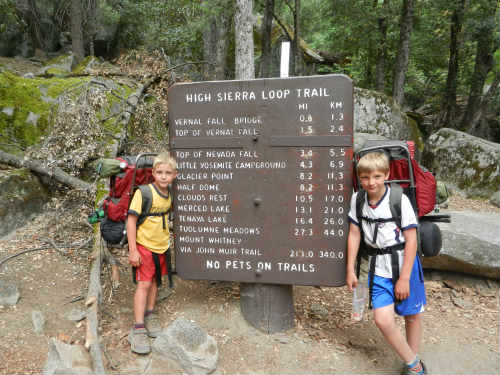
Backpackers hiking the John Muir trail traditionally start at the base of Vernal Fall in Yosemite National Park, and climb upward past Vernal and Nevada falls, Half Dome, and Little Yosemite Valley campground while making their way toward Tuolumne Meadows.
For our 20-mile John Muir Trail trip with young kids, we decided to tackle the John Muir Trail in reverse, which allowed for more downhill sections of trail and fewer crowds until the end of our journey.
Yosemite Day 1 (3 miles):
In order to start our Yosemite backpacking trip in Tuolumne Meadows, we began at the Sunrise Trailhead at Tenaya Lake on Tioga Road.
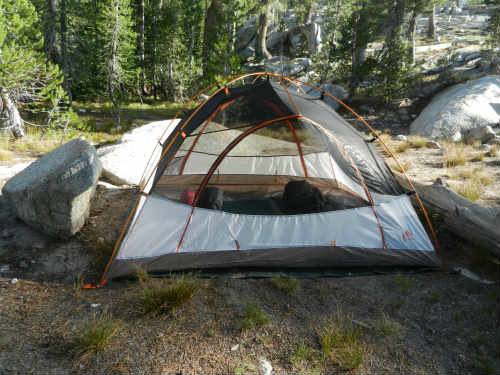
We followed the Sunrise Trail up steep switchbacks to connect with the Forsyth Trail near beautiful Sunrise Lake (a great first night camping option).

Yosemite Day 2 (8 miles):
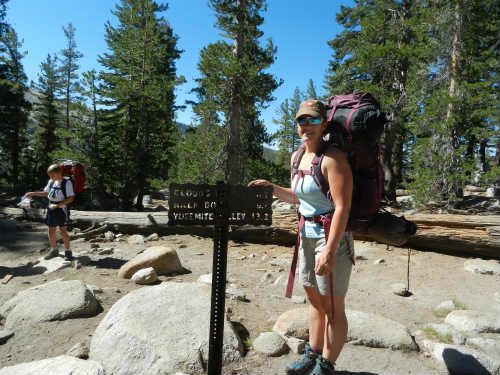
From Sunrise Lake, we continued to follow the Forsyth Trail to intersect with the Clouds Rest junction, leading 2 miles to arguably the best viewpoint in Yosemite National Park.
From Clouds Rest, hikers can see the entire Yosemite Valley, including an unique view of Half Dome.
Note: the pinnacle of Clouds Rest is fully exposed, with steep drop offs on each side.
This is not a place for young children or anyone with vertigo or a fear of heights.
Since I fall into that category (hiking with a small child), we viewed the Yosemite landscape from just .2 mile below the top, which also offers wonderful vistas.
Hikers can continue past Clouds Rest to intersect with the John Muir Trail several miles later, but as this section of trail is still exposed and at great heights, we opted to return the 2 miles back to the Forsyth Trail and join the John Muir Trail much earlier.
This first section of John Muir winds through old growth forest alongside Sunrise Creek, and affords several nice campsites adjacent to this water source.
This section of the John Muir Trail is less traveled, but we were still surprised to find we didn’t encounter a single hiker all evening, night, or morning.
John Muir Trail Day 3 (5 miles):
Day 3 took us along the John Muir Trail from Sunrise Creek into Little Yosemite Valley.
This backpackers’ haven offers numerous campsites along the Merced River (perfect for swimming in after a long day hiking!).
Though lively, Little Yosemite is a fun oasis for hikers, offering conversation and companionship around the communal fire pit after days of relative isolation.
En route to Little Yosemite Valley, the John Muir Trail offers views of Half Dome, and the steady accent of hikers navigating its cable system to the top.
Should you wish to ascend Half Dome yourself, the trail intersects with the final 2 miles of the Half Dome Trail mid-way through your hike down to Little Yosemite. Note: this is another steep, exposed trail.
Though children can ascend it, be advised that very small kids may not be able to reach the cables, essential to a safe ascent.
Our 13 and 11-year-olds could make the trek, but not our seven-year-old.
For those not challenging Half Dome, it’s fun stop on John Muir Trail or Little Yosemite Valley and use binoculars to watch the climbers.

John Muir Trail Day 4 (4.5 miles):
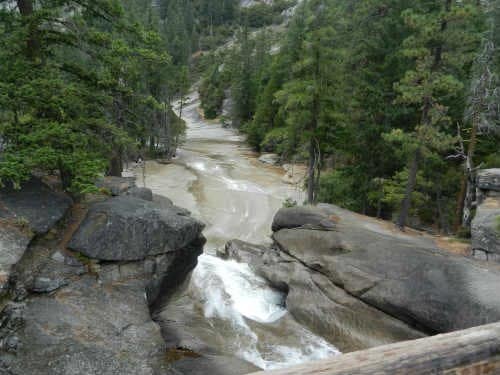
Our final day on the John Muir Trail led us down from Little Yosemite Valley to spectacular Nevada Fall, where the trail splits into the John Muir or the popular Mist Trail.
We opted for the Mist Trail in order to glimpse the best views of nearby Vernal Fall, but the steps descending both falls are steep and can be slippery when wet.
Be advised that the Mist Trail gets crowded with day hikers, and can be hard to navigate with overnight backpacks.
The option of continuing on the John Muir Trail has its own set of disadvantages: it’s a longer route to the valley floor, and more exposed, providing little shade.
Either route you take will lead you eventually to Happy Isles on the Yosemite valley floor, where camping, lodging, shuttle transportation, and a good meal await.

How to prepare for hiking the John Muir Trail
Anyone planning to hike any portion of the John Muir Trail must obtain a Yosemite wilderness permit.
Permits can be secured up to 168 days prior to the date desired, and for summer backpacking in Yosemite, reserving a permit the full 168 days out is recommended since the trails do fill up.
Inside Yosemite National Park, all backpackers are also required to carry bear canisters to store and secure all food (tree hanging is not permitted).
Bear canisters can be rented (for only the price of a deposit) from Yosemite National Park Wilderness Centers (where you’ll also pick up your permit) or hikers can bring their own.
In addition to food, any item with a scent must be stored in a canister, including toothpaste, lotion, bug spray, and even chap stick, so plan accordingly.
If you plan to hike Half Dome, Half Dome permits are required, and they are separate from backcountry permits (though you can obtain both simultaneously).
Be sure to carry your permits with you at all times; you will be asked to show them.
If you plan to stay a night before or after your backpacking trek in Yosemite National Park (recommended), be sure to secure lodging early, as this is one of the most crowded national parks in America.
Backpackers can also make use of free backpacker campgrounds the day before and after their backpacking trip.
Hazards to be aware of hiking the John Muir Trail
In addition to dizzying heights, bears, and crowds near the valley floor, backpackers need to be aware of the significant elevation gains to be experienced on the Yosemite section of the John Muir Trail.
Elevations reach over 9,000 feet, necessitating plenty of water intake to prevent headaches and nausea.
Other wildlife can pose a threat if hikers are not alert, including rattlesnakes — we encountered the biggest we’ve ever seen at Little Yosemite Valley.
Getting to and from your car
Whether you’re hiking the John Muir Trail from the valley floor up or from Tuolumne Meadows down, as we did, you’ll need transportation back to your car at the end of your trip.
Yosemite National Park offers free shuttle service throughout the valley, but to travel to Tuolumne or vice versa, you’ll need to take Yarts, a paid shuttle service with stops in Yosemite Village and points throughout Tuolumne.
Hikers cannot make reservations in advance for Yarts, and though we were told buses never fill up, that was not the case.
Be sure to be at the stop before the allotted time and have cash in hand.
One-way tickets were less than $10 at the time of our visit.
Hiking the John Muir Trail is sure to be a memorable experience.
What section is your preference and what advice would you offer?
Planning Your Own Hiking Tour
Hiking is one of my favorite green activities.
It’s something you can do close to home and across the world.
It can be for leisure and for exercise.
I love that it can be done solo or with a group.
Personally, I always love trekking with a hiking tour group.
The group of people keeps me motivated, plus there is usually lots of interaction and great conversation.
You can meet all sorts of interesting people during hiking tours.
Hiking questions to consider
To find one of the best hiking tours for you, it is crucial that you consider who will be going with you.
Will kids be hiking?
What are their ages?
More importantly maybe, what are their abilities?
What kind of terrain are you interested in?
What kind of scenery would you like to see?
Consider the climate and the time of year you are able to visit.
Will you be bringing your dog with you?
Be sure to look for a pet-friendly hiking group.
Are you looking to hike for the majority of the day or for an hour or two a day?
All of these are important considerations to decide if a hiking tours are for you.
If it is more appropriate for you to go but without an organized group.
Hiking Tour Companies
There are many hiking tours available, and depending on what you’re looking, for there’s probably a hiking tour for you.
Best UK Walking Cycling Holiday
Here is a very small sample of a couple of hiking tour companies that we like.
If you have ever been on a hiking tour, think about what you did and did not like so that you can craft one to better serve your needs.
First of all, remember that the greenest hiking tours will practice leave no trace, will use local guides, and support the local economy.
So we highly recommend checking out local hiking tour companies in the country that you are planning on visiting.
Gap Adventures has world-wide hiking tours and tour groups.
They are relatively inexpensive and offer a huge variety of trips.
Wilderness Inquiry is a Minnesota based non-profit that has a variety of hikes and trips all over the world.
Again, they are very affordable and specialize in trips that are accessible.
photo credit: Jenster181
Hiking Tours: Plan Your Own
If you do not want to pay for a hiking tour, you can plan your own.
There are numerous databases to help you plan your hike.
We like the following to check out routes:
Trail Database is the world’s largest trail database and it’s fairly comprehensive.
Trails.com has good US trekking maps along with some maps of Canada, Mexico and the Caribbean.
And Google Earth shows hiking trails so you can look directly at the terrain you are planning on hiking.
Of course, the best place to meet people to hike and to learn about trails is at a hostel nearby the location where you want to hike.
We recommend showing up a day or two before you want to head out on the trail and see what others are planning.
A last option for hiking tours is to look on Meetup.com.
Many cities have a hiking group.
We were part of a Washington, DC hiking meetup group.
Some of our most memorable hiking tours have been in El Chalten, Argentina and up to the Lake Agnes Tea House in Canada.
Hiking in general is pretty fantastic.
Remember to explore close to home whenever you get the chance.
You don’t have to wait for your yearly vacation to enjoy hiking.
There are many state parks, forest preserves, and interesting trails, some closer than you think.
When in a foreign country, sometimes it is best to go with a group and research hiking tours. Best Trekking Destination in Nepal
Related Articles:

